🚇 Cloudflare Tunnel — Phase 2 (Onsite Installation)
Project
GraniteLabs.ai – Secure Remote Access (Blue Iris)
Status: Ready for onsite installation on Blue Iris workstation
🎯 Objective
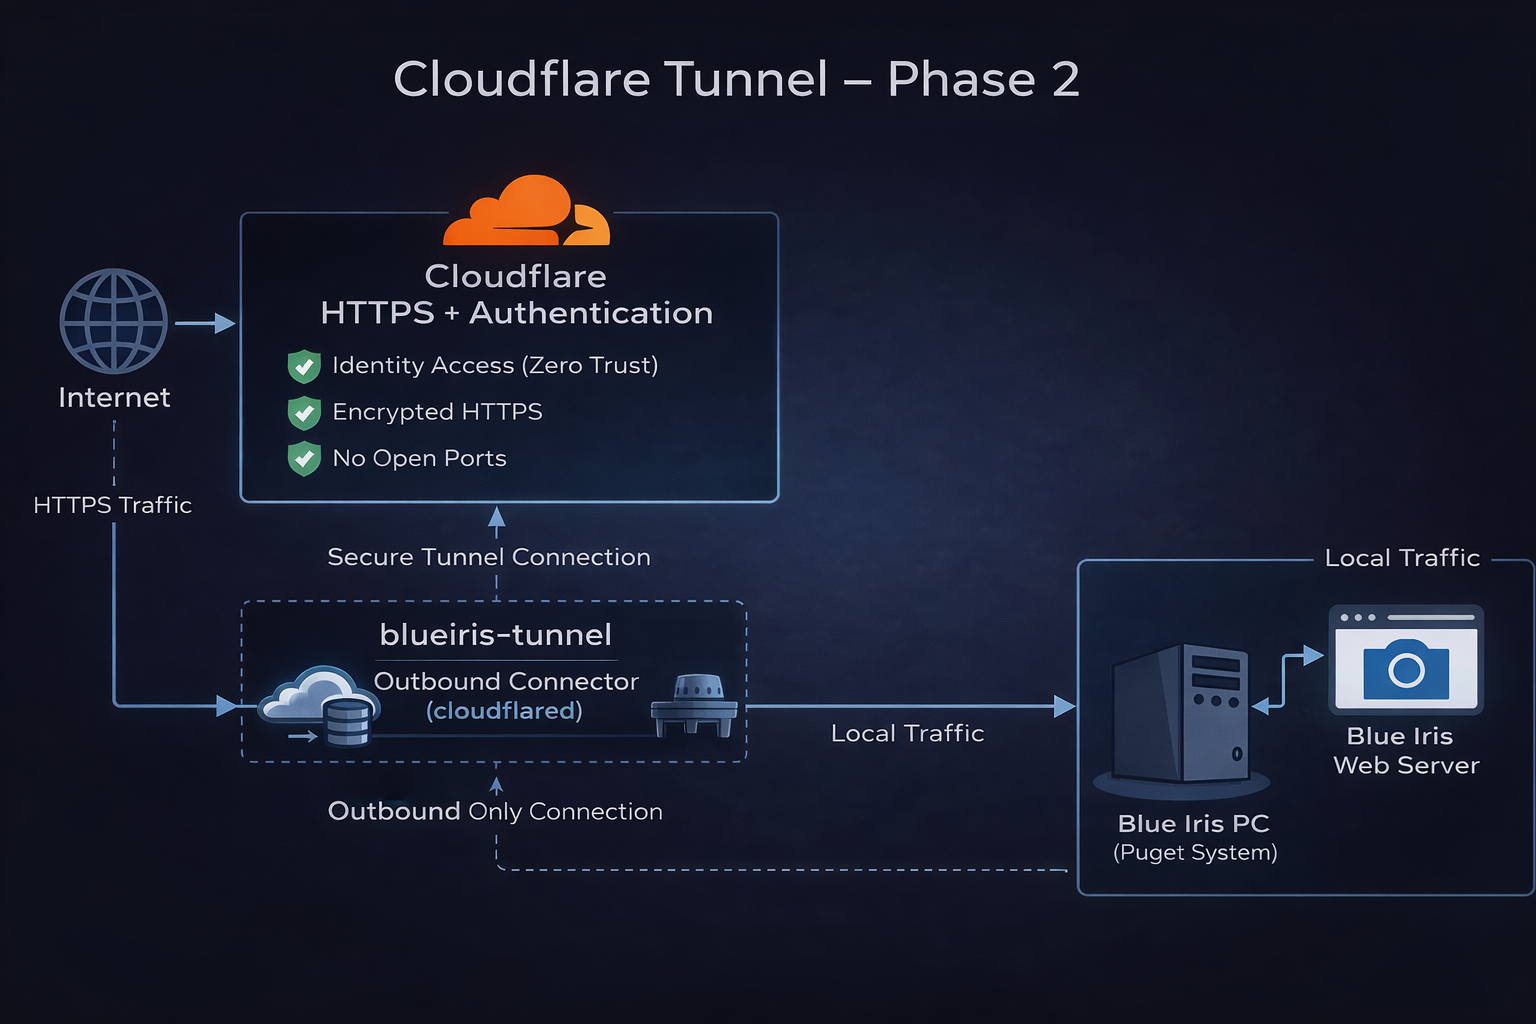
Complete the onsite deployment of the Cloudflare Tunnel connector on the Blue Iris PC and bring the secure remote access path online without opening inbound firewall ports.
🧠 Phase 2 Goal
- Install
cloudflaredon the Blue Iris workstation - Authenticate and attach the connector to the existing tunnel
- Bring the tunnel online
- Create the production hostname
- Map external HTTPS traffic to the internal Blue Iris web server
- Prepare for Cloudflare Access protection
✅ Starting Point
The following items were completed in Phase 1:
- Domain added to Cloudflare
- DNS active in Cloudflare
- Zero Trust account available
- Tunnel created:
blueiris-tunnel - Connector token generated
- No open inbound ports required
- Blue Iris not yet exposed externally
🖥️ Target System
Host Device: Blue Iris PC
Platform: Windows 64-bit
Installer: cloudflared-windows-amd64.msi
🔧 Planned Onsite Tasks
1. Install Connector
Install cloudflared on the Blue Iris PC using the Windows 64-bit installer.
2. Authenticate Connector
Use the previously generated Cloudflare tunnel token tied to:
blueiris-tunnel
3. Bring Tunnel Online
Confirm that the connector appears as connected in Cloudflare Zero Trust.
4. Create Hostname
Create the public hostname for Blue Iris access.
Planned hostname:
bi.granitelabs.ai
5. Map to Local Service
Route the hostname to the internal Blue Iris web server.
Target service:
http://localhost:<BI_PORT>
Replace
<BI_PORT>with the actual Blue Iris web server port configured on the workstation.
6. Validate Internal Reachability
Confirm that Blue Iris is reachable locally before final tunnel testing.
7. Prepare Access Protection
Set up Cloudflare Access rules for authenticated access.
🌐 External Request Path
Remote User
    │
    ▼
Cloudflare DNS / HTTPS
    │
    ▼
Cloudflare Zero Trust
    │
    ▼
blueiris-tunnel
    │
    ▼
Blue Iris PC
    │
    ▼
Blue Iris Web Server